• File
    • Import file(Ctrl+O)
    • Clear all(Ctrl+E)
    • Save Design(Ctrl+S)
  • Saved

      Saved designs

      • All categories
      • Category #1
      • New Category
    • Print

        Print design

    • Share

        Share Your Design Back to share

      • Create a link to share your current design with anyone you choose

        Your link has been created successfully

        Share to:

    • Help

      • Customization


        1. Go to the product tab and select the color, quantity, and any additional options.
        2. Customize your product by adding text, clipart, or uploading your own image. Alternatively, explore the Designs tab for pre-made designs that you can modify.
        3. After customizing, you can choose to save your design or add it to your "My Designs" to proceed to cart.

        Note: The "My Designs" folder offers convenience by allowing you to store multiple designs of the same or different products in one place. Add each design to "My Designs," then order everything at once, saving you time and effort.


        Order Placement


        1. Add your design(s) to the "My Designs" folder by clicking "Add to Designs" on PC or the "➜" symbol on phone.
        2. When ready, click the Proceed button to add all designs to your cart and continue to checkout for payment.


        Saving Your Design


        To save your design, click on the "File" option located in the top-left corner. (On mobile, the "File" option can be accessed through the menu toggle in the top-left corner.) From the dropdown menu, select "Save Design." You can view your saved designs by going to "Saved," which is located next to the "File" option.


        Background


        To add a background color to the product canvas, open "Shapes", select a shape that fits your canvas, resize it to cover the entire area, and then change its color to your desired background.


        Combining Designs


        To combine designs on a single product canvas, click on the "Options" in the top right corner and enable "Design Append" from the dropdown menu.


        Aligning Designs


        To view horizontal and vertical alignment lines on the product canvas, click on "Options" in the top right corner and enable "Auto Snap Mode" from the dropdown menu.


      • What are Customization Modes?


        Customization modes define different methods for customizing a product. Each mode offers unique way to modify the design, with the active mode and a brief description displayed under the Product tab in the customizer.

        What is the Designs Library?


        The Designs Library offers pre-made graphics within the product customizer, tailored to specific canvases. Preview and either order as-is or customize. Some designs are free, while others require a fee.

        How can I use a design from one product on another?


        To apply a design from one product to another, save the design, exit the customizer, and open it for your preferred product. Apply the saved design, make any necessary adjustments, and then place your order.

        Note: The design author will be credited, and any design costs will be included in the invoice.

        What should I do if I don't have enough space for my customization?


        If you don't have enough space for your customization, contact us for assistance to find a more effective solution.

        Why is the Customizer page taking too long to initialize?


        This may be caused by an incompatible browser or a slow, inconsistent internet connection. Try refreshing the page or switching to one of our recommended browsers (Chrome, Firefox, Opera, Explorer, or Safari).

        What should I do if the Customizer page is not opening properly?


        If the Customizer page is not opening properly on your devices, try switching the screen orientation to resolve the issue.

        Why does it take a long time to proceed from the Customizer page to the Cart?


        If it takes a long time to proceed from the Customizer page to the Cart, it could be because of a large file size or slow internet connection. Wait a few minutes to see if the design is submitted to the Cart, and if not, refresh the page and repeat the process.

        Tip: If you have multiple designs in the designer, it is recommended to save them first to avoid losing any of them. After saving, remove the designs and attempt to add them to the cart one at a time.

        Note: Please note that these suggestions are provided based on general troubleshooting and may not be specific to your situation. For more assistance, feel free to contact us.

      • ctrl+a Select all objects
        ctrl+d Double the activate object
        ctrl+e Clear all objects
        ctrl+s Save current stage to my design
        ctrl+o Open a file to import design
        ctrl+p Print
        ctrl++ Zoom out
        ctrl+- Zoom in
        ctrl+0 Reset zoom
        ctrl+z Undo changes
        ctrl+shift+z Redo changes
        ctrl+shift+s Download current design
        delete Delete the activate object
        Move the activate object to left
        Move the activate object to top
        Move the activate object to right
        Move the activate object to bottom
        shift+ Move the activate object to left 10px
        shift+ Move the activate object to top 10px
        shift+ Move the activate object to right 10px
        shift+ Move the activate object to bottom 10px

      • Copyright © 2024 Persinna
        All Rights Reserved.

        Powered by Lumise version 2.0.6

    • Undo
    • Redo
    • Canvas
    • Product
    • Designs
    • Text
    • Upload
    • Cliparts
    • Templates
    • Shapes
    • Layers
      More

    Click or drag to add text

    Click or drop images here

    Support: PNG, JPG & SVG

        • Start designing by adding objects from the left side
        • All selected objects are grouped | Ungroup?
        • Group objects Group the position of selected objects
          • Fill options

            Save this color

          • Create QRCode
          • Options
            • Automatically align the position of the active object with other objects
            • ON: Keep all current objects and append the template into OFF: Clear all objects before installing the template
            • Replace the selected image object instead of creating a new one
          • Replace image
          • Crop
          • Mask
            • Select mask layer

          • Remove background
            • Remove background

            • Deep:

            • Mode:

          • Filters
            • Filters

              • Original
              • B&W
              • Satya
              • Doris
              • Sanna
              • Vintage
              • Gordon
              • Carl
              • Shaan
              • Tonny
              • Peter
              • Greg
              • Josh
              • Karen
              • Melissa
              • Salomon
              • Sophia
              • Adrian
              • Roxy
              • Singe
              • Borg
              • Ventura
              • Andy
              • Vivid
              • Purple
              • Thresh
              • Aqua
              • Edge wood
              • Aladin
              • Amber
              • Anne
              • Doug
              • Earl
              • Kevin
              • Polak
              • Stan

            • Brightness:

            • Saturation:

            • Contrast:

          • Clear Filters
          • Click then drag the mouse to start drawing. Ctrl+Z = undo, Ctrl+Shift+Z = redo
          • QRCode text
          • Fill options
            • Fill options

              Save this color

              • Transparent:

              • Stroke width:

              • Stroke color:

            • Ungroup position
            • Arrange layers
            • Position
              • Object position

                Lock object position:

              • Center vertical
              • Top left
              • Top center
              • Top right
              • Center Horizontal
              • Middle left
              • Middle center
              • Middle right
              • Press &leftarrow; &uparrow; &rightarrow; &downarrow; to move 1 px, <br>Hit simultaneously SHIFT key to move 10px
              • Bottom left
              • Bottom center
              • Bottom right
            • Transforms
              • Rotate:

              • Skew X:

              • Skew Y:

              • Flip X:
                Flip Y:

                Free transform by press SHIFT+⤡

            • Font family
            • Edit text
              • Edit text

              • Font size:

              • Letter spacing

              • Line height

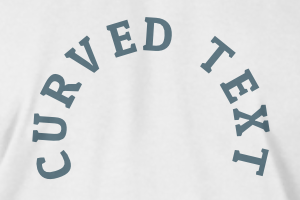
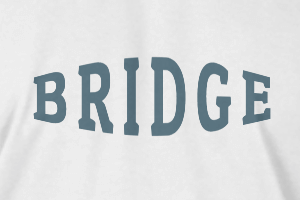
            • Text Effects
              • Text Effects

              • Radius

              • Spacing

              • Curve

              • Height

              • Offset

              • Trident

            • Text align
            • Uppercase / Lowercase
            • Font weight bold
            • Text style italic
            • Text underline

            Please select a product to start designing

            Scroll to zoom